Humidity and Temperature sensor DHT11 or DHT22
detects drop in humidity switch on humidifier interfaced with Arduino, Node MCU, ESP32
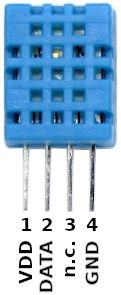
DHT22 and DHT11 element is strictly calibrated in the laboratory which is extremely accurate in humidity calculation. The calibration coefficients are stored as programs in the OTP memory, which are used by the sensor’s internal signal detecting process.
Thermistors are generally produced using powdered metal oxides or semiconductor made of ceramic materials and in both cases their resistance changes dramatically with temperature (by 100 ohms or more per degree).
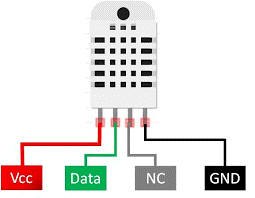
Both DHT11 and DHT22 has a built in SoC (System on Chip) or a small micro-computer built in with its own ADC (Analog to Digital converter) of 8 bit which would suffice our desired accuracy for both temperature and humidity.
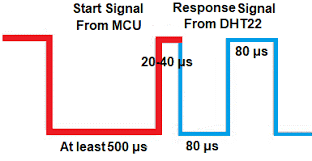
A single bus communication protocol is used to communicate between DHT22 or DHT11 with Arduino, Node MCU or ESP32 microcontroller. Before anything else happens Arduino will send start signal which will be responded by DHT22/DHT11 as shown. This is followed by data consisting of decimal and integer parts. The total data is 40 bit long and its is MSB format. The Data format is as follows: 8bit integral RH data + 8bit decimal RH data + 8bit integral T data + 8bit decimal T data + 8bit checksum.
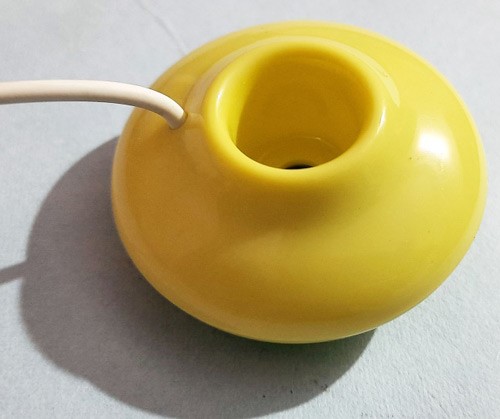
Humidifier is a device used to increase the relative humidity of a closed area to ensure enough moisture in the area. Especially during winters, when the heater is turned on, it causes the relative humidity of the air to decrease. In this DIY project, we are going to build an automatic humidifier, which can maintain the relative humidity of the atmospheric air by using sensor mechanism. We are also using a display to show the relative humidity (RH) in terms of percentage of moisture in the air. Apart from Arduino and LCD, we are also using DHT11/DHT22 sensor to read the atmospheric humidity values. If it finds that relative humidity is lower than the required limit, it turns on the humidifier, and vice versa.
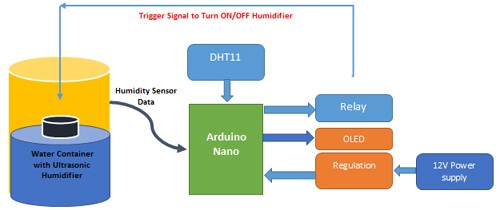
Portable humidifier can produce a warm/cool mist by using a metal diaphragm vibrating at high frequency. The sound vibrations propel moisture into the air. The mist produced in the humidifier is almost immediately absorbed into the air. The humidifier needs to be floated on water bed to produce the mist. The working of the humidifier that we are going to build can be understood by below block diagram:
As shown in the above block diagram, the ultrasonic humidifier is placed on the water surface in the container. The humidifier floats on the water. Since we need to sense the humidity, the DHT11 humidity sensor is connected with Arduino Nano and an OLED display is connected to display the real-time values. Moreover, depending on the humidity value, we need to trigger the relay, which in turn switches the humidifier to ON/OFF. So, the humidifier value is compared with a reference value, and depending on the humidity values, the humidifier is
turned ON/OFF. Main features of this dehumidifier are given below:
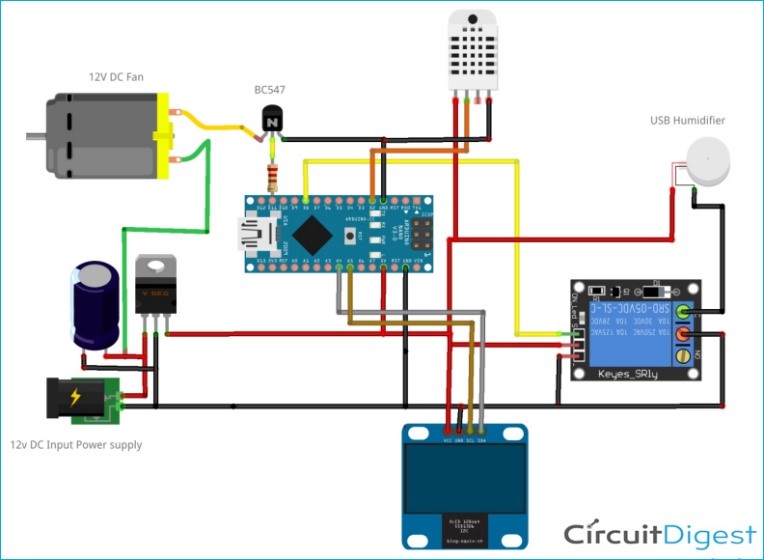
Portable Humidifier Circuit Diagram
Complete schematic for building a DIY Humidifier using Arduino is given here:
Let us learn the circuit diagram in detail. As shown, first of all a 12V DC power supply is converted into 5V DC power supply using 7805 Regulator and Capacitive filter. Then this power is supplied to Arduino Nano, OLED, DHT11 and Relay circuits. The data pin of DHT11 is connected to the Digital input pin of Arduino as shown and configured in the code. The OLED display is connected to Arduino via the I2C Pins which are A4, A5 pin of Arduino. Similarly, the digital output pins of Arduino are connected to the Relay and BJT for DC Fan driving.
Arduino. Similarly, the digital output pins of Arduino are connected to the Relay and BJT for DC Fan driving.
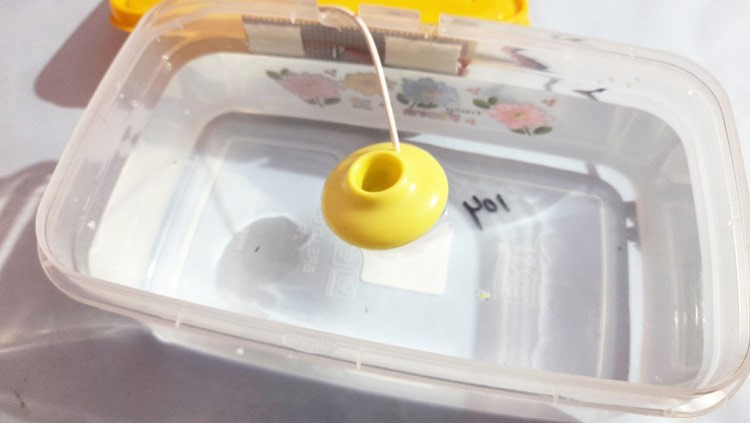
Fill the container with fresh water up to 3/4th of the container and then float the humidifier on it as shown below:
Power ON the Adapter to switch ON the circuit and now we should see the humidity levels on OLED.
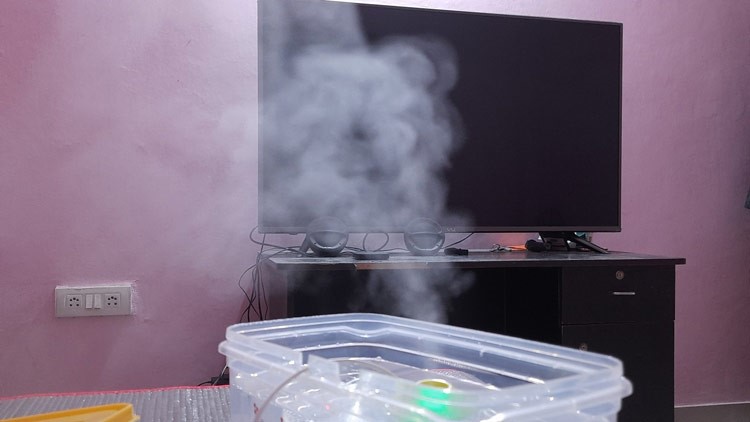
Then if the humidity level is less than Reference, then the Humidifier should start producing mists and the Fan should be turned ON.
What is said about Arduino will hold good for Node MCU and ESP32 as well.
